Welcome to the start of your journey with Adobe Experience Manager, we’re happy to have you aboard. AEM is a powerful and valuable tool for web development and content management used by major corporations and organizations all over the world. Today we’ll be starting off small by walking you through how to get a local instance of AEM 6.5 installed onto your computer so you can begin playing around with AEM and its tools.
Please note, the images and commands referenced in this post are used on and captured from a Macbook Pro running macOS Venture 13.2.1. If you’re on a Windows machine or a much newer version of macOS, and you notice some things looking or behaving slightly differently on your machine, don’t panic! This is likely just due to mild differences in the UI. All listed commands should work just as well on Windows as they do on Mac.
To get started, you’ll want to make sure you have the latest release of Java installed on your machine. Java is an important part of AEM’s architecture, and we will be using a few Java commands in the course of installing AEM. You can find the link to download Java here.
While it’s not necessary, I did want to mention that if you’re working on a Mac computer, I would recommend installing Iterm2 as well. It’s a more robust and feature-rich version of Mac’s default terminal application and makes working in the terminal a lot easier. AEM developers live in the terminal, so anything you can do now to improve your comfort with it will benefit you for years to come. You can find the link to install that here.
Once Java is installed, you’ll need to get access to the AEM quickstart jar file and an AEM license. If you’re an Adobe Solution Partner, you can get access to a local AEM Developement Environment. First, be sure that you are signed into your Adobe Solution Partner Account. Then you can use this link to find the form needed to ask for a development account: https://solutionpartners.adobe.com/solution-partners/home/learn/tools/application_downloads.html
Fill out the Adobe Experience Manager download request form and Adobe will follow up with an email containing a download and a license key.
If you are working on AEM as an individual, licenses, and files can be purchased here.
Now that you have Java installed and access to the AEM quickstart jar file, you’ll want to create a general AEM directory to help keep your machine organized, as well as two sub-directories, author and publisher. The author instance of AEM is where you’ll create and push new content for your websites, while the publish instance is where the published content will reside, and where you’ll write code that users facing the website will need access to. Open up a terminal and execute the following commands:
mkdir -p ~/aem/
mkdir -p ~/aem/author
mkdir -p ~/aem/publisher
Next, you’ll want to copy the AEM quickstart jar file and your license files over to both directories.
Next, in the terminal, you’ll want to unpack the jar files. First, navigate to your author directory, and run the following command in your terminal:
java -jar AEM_6.5_Quickstart.jar -unpack -r authorOnce the file is finished unpacking, navigate to your publisher directory and run the following line:
java -jar AEM_6.5_Quickstart.jar -unpack -r publish
Once the jar files are finished unpacking, you should see a crx-quickstart folder in both directories. Navigate to your author directory, then navigate to crx-quickstart/bin, and open the start file with your text editor of choice.
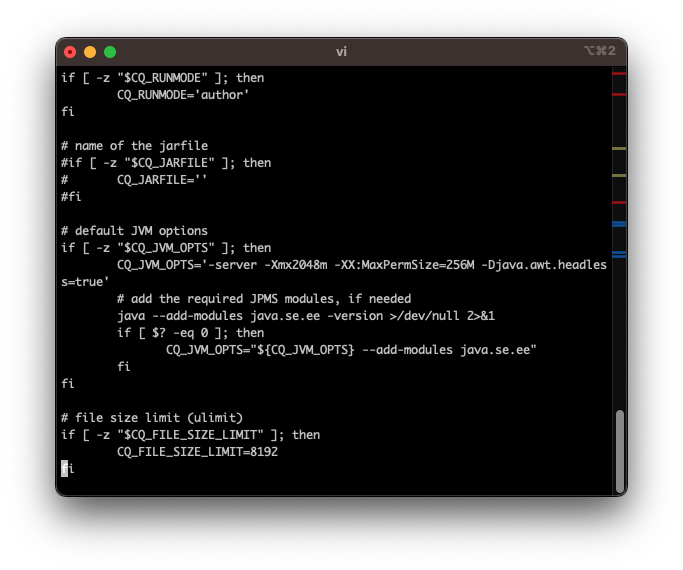
In the start file, Navigate down to the section that begins with the line # default JVM options. You should see an option labeled -Xmx1024m. Change that option to -Xmx2048m as in the picture above. This option determines how much RAM AEM is able to access while running on your machine, increasing this number should allow AEM to run much more smoothly.
Now navigate to your publisher directory, and within that navigate to the crx-qucikstart/bin, and again, open the start file with your text editor of choice. We have a few more lines we’ll want to edit in these files.
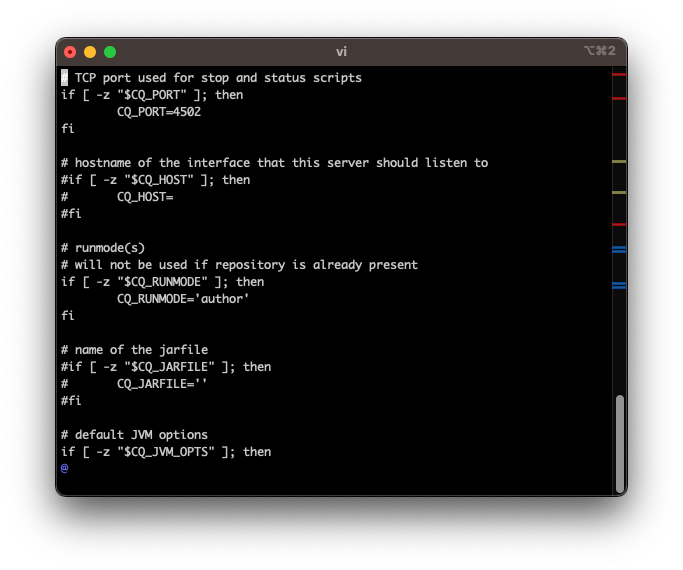
First, navigate to the section labeled TCP port used for stop and status scripts. Beneath there, you should see a line that reads CQ_PORT=4502. Change that port to CQ_HOST=4503. This line determines the local port that your AEM instance will run on when you start this version of AEM. Since our author instance is already running on 4502, we want to ensure that our publisher instance runs somewhere else so the two don’t interfere with each other.
Next, scroll down to the section labeled # runmode(s). you should see a line that read CQ_RUNMODE='author'. Change that line to CQ_RUNMODE='publisher'. This line determines what “mode” your AEM instance will be running in. Since this is our publishing instance, we want it to run in publisher mode.
Finally, navigate to the # default JVM options section and change -Xmx1024m to –Xmx2048m. Like in the author instance, this is increasing the amount of RAM AEM is able to access while running.
Congrats, you’ve installed AEM onto your local machine! To test this, go ahead and start each instance up and make sure everything loads correctly. To do so, navigate to your directory of choice and navigate down to crx-qucikstart/bin. In that directory type the command ./start. AEM will take a few minutes to start up, especially the first time your run it, so to make sure that everything is starting up properly run the command tail -f to see the processes being run.
Open your browser of choice and navigate to localhost:4502 if you’re running the author instance, or localhost:4503 if you’re running the publisher instance. Once everything loads properly, you should see the following login screen. The default username and password are both admin.
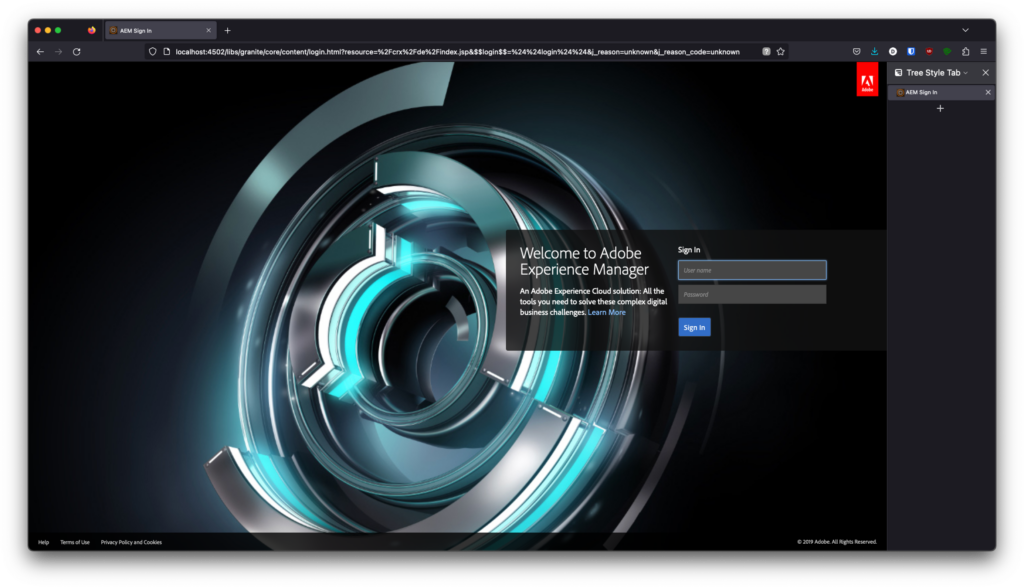
If you don’t see that screen initially upon startup, wait a few more minutes to allow AEM to finish setting up. If you’re still not seeing it, or are getting an error message, delete your current instance and reinstall AEM from the start.
Once again, congrats on getting started with AEM! To stop the instance, navigate to the respective crx-quickstart/bin directory in your terminal and run the command ./stop. Happy coding!